0% Financing For 18 MONTHS

How to Sand Cabinets for a Smooth Paint Finish

Achieving a smooth, professional paint finish on your cabinets starts with expert sanding. This crucial step creates the perfect surface for paint to adhere, ensuring a durable and beautiful result. Whether you’re a DIY enthusiast or prefer to leave it to the pros at Cabinet Painting Co, understanding the sanding process is key. In this guide, we’ll walk you through why sanding is essential, the tools you’ll need, and the techniques to avoid common pitfalls, all to help you achieve that perfect finish.
Picture of  Brian Shaffer

Brian Shaffer

Owner

Share This Article On:

Master the Art of Sanding Cabinets for a Flawless Paint Finish: Your Step-by-Step Guide

how to sand cabinets Kitchen with freshly painted cabinets after proper sanding and refinishing

Achieving a smooth, professional paint finish on your cabinets starts with expert sanding. This crucial step creates the perfect surface for paint to adhere, ensuring a durable and beautiful result. Whether you’re a DIY enthusiast or prefer to leave it to the pros at Cabinet Painting Co, understanding the sanding process is key. In this guide, we’ll walk you through why sanding is essential, the tools you’ll need, and the techniques to avoid common pitfalls, all to help you achieve that perfect finish.

Why Sanding Cabinets is a Game-Changer for a Smooth Paint Finish

Sanding is the secret to a flawless paint job. It removes old finishes, smooths out imperfections, and prepares the surface for a strong bond with primer and paint. This not only enhances the look but also extends the life of your paint job by preventing peeling and chipping. Let’s dive into the benefits and set the stage for choosing the right tools and grits.

Boosting Paint Adhesion and Durability Through Sanding

Sanding creates tiny grooves that help primer and paint stick better to the cabinet surface, enhancing adhesion and extending the finish’s lifespan.
  • Eliminates glossy layers that resist new coatings
  • Opens wood pores for better primer absorption
  • Creates a uniform surface for even paint application
These improvements in adhesion are crucial for a long-lasting finish, guiding us to the essential sanding supplies you’ll need.

The Role of Sanding in Paint Adhesion

Sanding is vital for removing old coatings, smoothing out imperfections, and creating a consistent surface for paint to adhere to, enhancing both adhesion and durability.
Understanding the importance of sanding is the first step in preparing your cabinets for a paint job that lasts.

Eliminating Surface Imperfections with Sanding

Sanding removes chipped paint, stain residue, and fine scratches, leaving a smooth surface ready for priming and painting.
  • Removes flaking or blistered paint
  • Levels out minor gouges and dents
  • Clears away residual varnish or stain
By eliminating these flaws, you ensure a seamless transition to selecting the right tools and materials for efficient sanding.

Creating the Perfect Surface Profile for Painting

Progressive grit sanding creates the micro-roughness needed for even primer distribution and smooth paint application.
  • Coarse grit (80–120) for removing old finishes
  • Medium grit (150–180) for smoothing out scratches
  • Fine grit (220+) for refining the surface before priming
Following a clear grit progression maximizes bonding and sets the stage for choosing your sanding equipment.

Grit Progression for Optimal Cabinet Sanding

Using a clear grit progression maximizes bonding and prepares you for selecting the right sanding equipment, starting with coarse grit for removing old finishes, medium grit for smoothing, and fine grit for refining the surface.
 
This guide helps you select the right sandpaper grit for a smooth and durable cabinet finish.

Essential Tools and Materials for Effective Cabinet Sanding

how to sand cabinets, Assorted sanding tools and equipment for cabinet prep, including sanders, blocks, and grit pads
Having the right tools makes sanding faster and ensures consistent results. Here’s a comparison of common sanding tools and their benefits:
  • Random Orbital Sander: Power sanding speeds up flat surface preparation.
  • Detail Sander: Precision reaches corners and grooves with ease.
  • Sanding Block: Control ensures even pressure by hand.
Choosing the right tool streamlines each sanding phase. Next, select the appropriate grit sandpaper, cleaning agents, and protective gear for a safe, dust-free environment.

Best Sandpaper Grits for Cabinet Sanding

Start with coarse 80–120 grit to quickly remove old finishes, move to medium 150–180 grit to smooth out deeper scratches, and finish with fine 220+ grit for an ultra-smooth base. This progression ensures each paint layer bonds perfectly to the prepared surface.

Recommended Sanders for Cabinet Projects

An electric random orbital sander is great for large, flat areas. A detail sander or wrapped sandpaper is perfect for edges and grooves, while a hand sanding block provides tactile feedback for even pressure.

Necessary Cleaning Supplies and Dust Removal Tools

Before and after sanding, use a trisodium phosphate (TSP) solution or mild degreaser to remove oils and grime. Capture dust with a shop vacuum equipped with a HEPA filter, then wipe surfaces with a tack cloth to remove fine particles before priming.

Personal Protective Equipment (PPE) for Safe Sanding

Protect yourself with a dust mask or respirator, safety eyewear, and work gloves. Ensure proper ventilation to reduce dust exposure.
 

Step-by-Step Guide to Sanding Cabinets for a Smooth Paint Finish

how to sand cabinets Elegant white kitchen showing professionally refinished cabinets after detailed sanding process
Follow this detailed procedure to prepare your cabinets for a perfect paint finish.

Preparing Cabinets for Sanding

Start by removing all doors, drawers, and hardware. Clean surfaces with a degreasing solution to remove oils and contaminants. Label components to stay organized and ensure even sanding on clean, residue-free wood.

Correct Order for Sandpaper Grits

  • Use 80–120 grit to remove old coatings and level rough areas.
  • Switch to 150–180 grit for intermediate smoothing.
  • Finish with 220+ grit to refine the surface and minimize scratches.
This sequence prevents deep scratches from showing through primer and paint.

Sanding Cabinet Details Like Corners and Grooves

Wrap fine-grit sandpaper around a small block or use a detail sander to gently follow profiles. Work along the grain to avoid marks, preserving the cabinet’s design while ensuring even abrasion in tight spaces.

Proper Dust Removal After Sanding

Vacuum all surfaces immediately after sanding to capture loose particles. Wipe with a tack cloth or lint-free rag dampened with mineral spirits for a final dust-free surface. Effective dust removal is crucial for a flawless primer application.

Ensuring a Dust-Free Surface After Sanding

Effective dust removal is essential for a flawless primer application. Vacuum all surfaces immediately after sanding and wipe with a tack cloth or lint-free rag dampened with mineral spirits for a final dust-free surface.
This guide emphasizes the importance of removing dust after sanding to ensure a clean surface for paint application.

Advanced Sanding Techniques for an Ultra-Smooth Finish

how to sand cabinets, Hand brushing sanding dust from cabinet surface after fine grit sanding for ultra-smooth finish
Take your sanding skills to the next level with these professional techniques.

Enhancing Smoothness with Wet Sanding

Wet sanding with 400–600 grit sandpaper and a light water mist fills scratch valleys and removes tiny debris, resulting in a glass-like surface. This method reduces dust and creates an exceptionally smooth finish that enhances paint sheen and clarity.

Using Wood Grain Filler for a Perfect Finish

On porous woods like oak, apply a compatible grain filler after initial sanding. Allow it to cure, then sand level with fine 220+ grit. Filling pores prevents uneven paint settling and ensures a smooth finish on open-grain surfaces.

Sanding Between Primer and Paint Coats

Lightly scuff with 320–400 grit between each primer and paint coat to remove dust specks and maintain an even surface, ensuring a factory-grade finish.

Avoiding Common Sanding Mistakes for Best Results

how to sand cabinets, Woman using hand sanding block to smooth wooden cabinet surface and avoid over-sanding mistakes
Steer clear of these common errors to protect your cabinets and paint quality.

Avoiding Damage from Over-Sanding and Uneven Pressure

Excessive sanding can damage veneer or thin edges, while uneven pressure creates low spots. Use consistent, gentle strokes and check your progress frequently to avoid irreversible damage.

Preventing Dust Contamination

Leftover dust creates bumps under primer and paint, compromising smoothness and adhesion. Clean surfaces with a vacuum and tack cloth after each grit change to maintain a pristine work area.

The Importance of Following Proper Grit Progression

Leftover dust creates bumps under primer and paint, compromising smoothness and adhesion. Clean surfaces with a vacuum and tack cloth after each grit change to maintain a pristine work area.

Is Cabinet Restoration Right for You?

Skipping grits can cause coarse scratches to show through primer, resulting in visible lines and poor paint bonding. Follow the full grit sequence for uniformity and durability.
Proper sanding transforms cabinet surfaces into the perfect canvas for paint. For those seeking expert results without the effort, trust the professionals at Cabinet Painting Co to deliver a flawless, long-lasting finish. For detailed primer and paint recommendations, visit Sherwin-Williams for comprehensive guidance. Invest in meticulous preparation today to enjoy a kitchen or bathroom that looks freshly factory-finished for years to come.

The Power of Preparation: Why Sanding Is the Key to Cabinet Painting Success

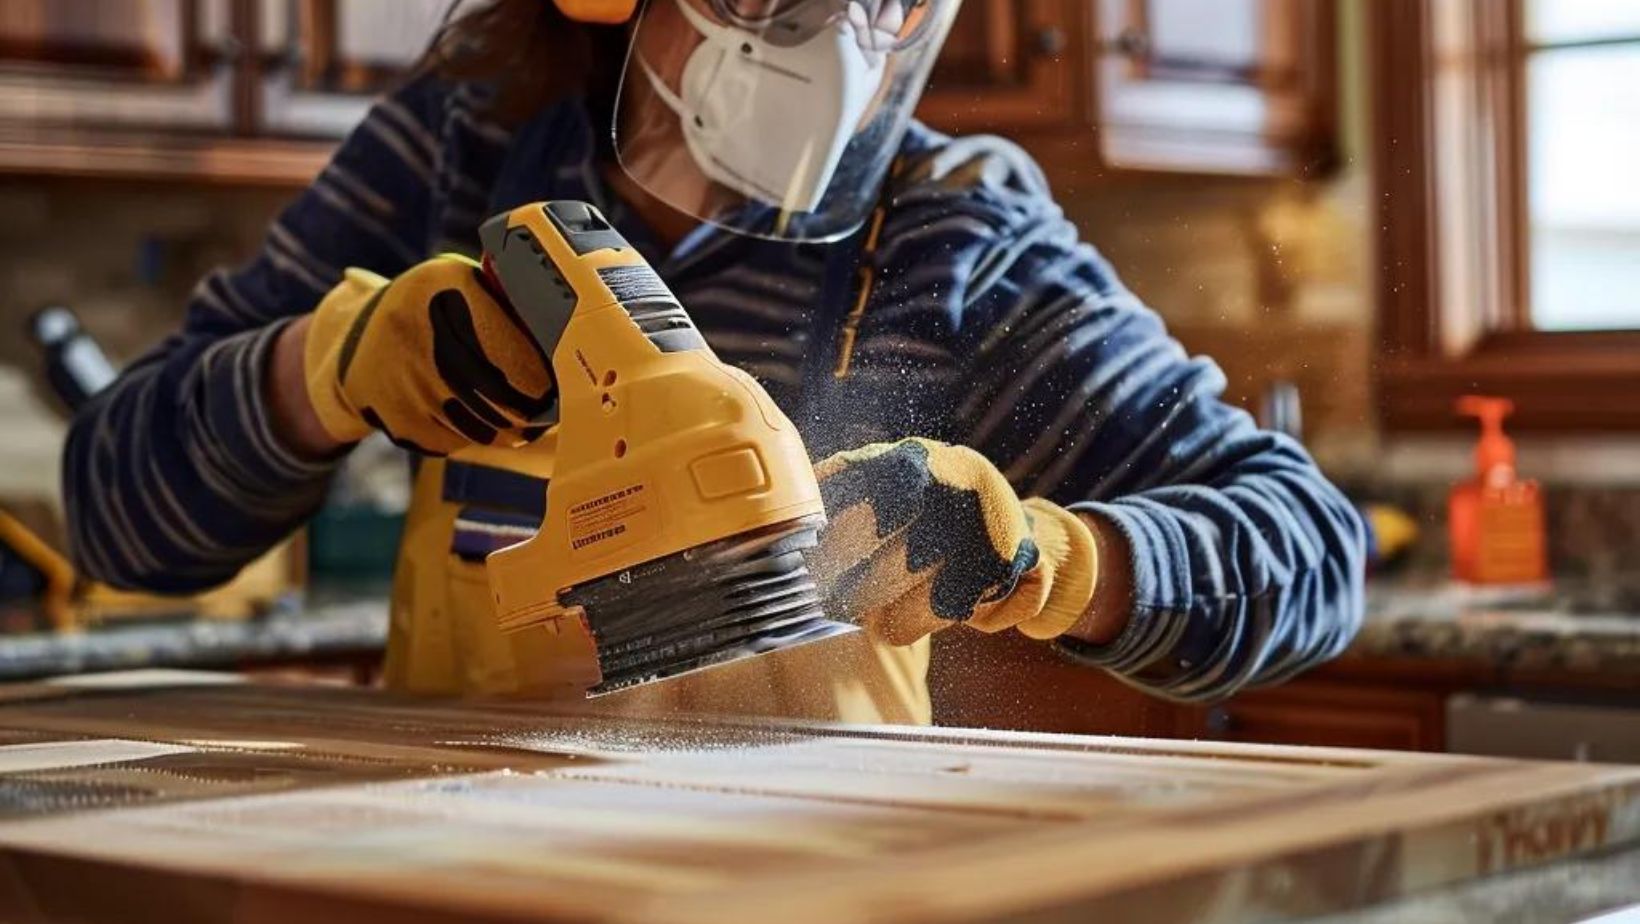
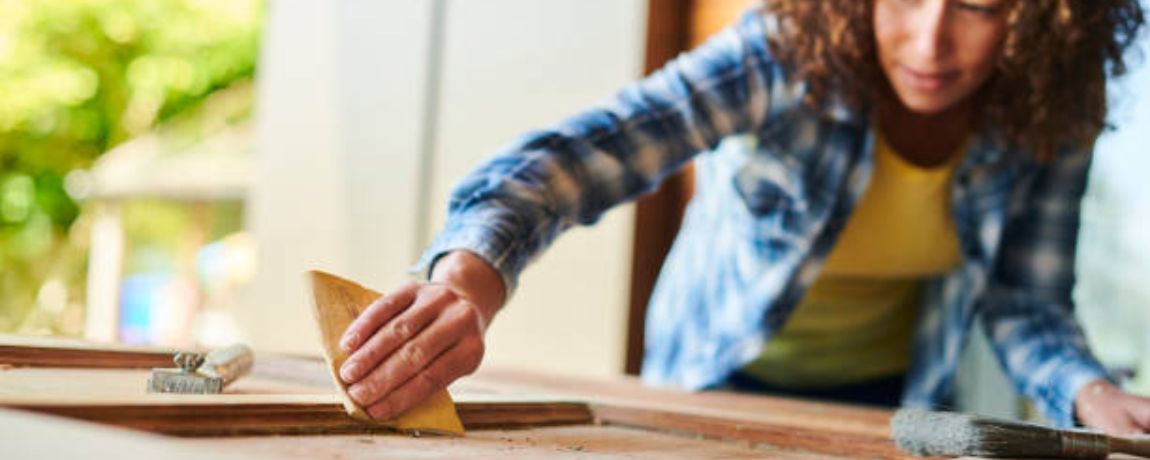
Sanding may seem like a tedious step, but it’s the cornerstone of a flawless, long-lasting cabinet paint job. From removing old finishes to perfecting surface texture and ensuring optimal paint adhesion, proper sanding techniques make all the difference. Whether you’re a weekend DIYer or hiring the experts at Cabinet Painting Co, investing time in this preparation stage pays off with a smooth, professional finish that elevates your entire space. Don’t cut corners—embrace the sanding process and enjoy beautifully restored cabinets that stand the test of time.

Table of Contents

Frequently Asked Questions About Sanding Cabinets for a Flawless Finish

Cabinet restoration involves refurbishing existing cabinets by refinishing or repairing them to achieve a refreshed look. It is a more cost-effective and environmentally friendly option compared to completely replacing cabinets, which involves tearing out the old cabinets and installing new ones.
The duration of cabinet restoration depends on factors such as the size of your kitchen, the condition of the cabinets, and the specific refinishing techniques used. Generally, it can take anywhere from a few days to a couple of weeks to complete the process.

Yes, cabinet restoration offers the flexibility to change the color, finish, or style of your cabinets. You can choose from a variety of paints, stains, and finishes to achieve the desired look that matches your kitchen’s aesthetic.

Yes, updating kitchen cabinets through restoration can enhance the overall appeal and market value of your home. Potential buyers often appreciate well-maintained and updated kitchens, making your property more attractive in the real estate market.

Cabinet restoration can address various repairs, including fixing loose hinges, repairing minor surface damage, or replacing worn-out hardware. The process ensures that your cabinets not only look new but also function optimally.

Yes, choosing cabinet restoration over replacement is an environmentally conscious decision. By refurbishing existing cabinets, you reduce waste and minimize the environmental impact associated with manufacturing and disposing of new materials.

Additional Resources

This comprehensive guide provides detailed instructions and professional insights, featuring tips from cabinet painting co, into safely removing cabinet doors and hardware. It covers the appropriate tools, methods, troubleshooting tips, and safety precautions backed by…

Before starting any cabinet painting project, thorough cleaning of the cabinet surfaces is essential. Proper cleaning ensures that the paint adheres well and the finish remains smooth and durable. In many cases, consulting a cabinet…

Is your kitchen in need of a fresh look, but a full remodel isn't quite in the cards? Cabinet restoration might be the perfect solution to breathe new life into your space without breaking the…

Ready To Transform Your Cabinets?

Revitalize your kitchen today with our expert cabinet painting services with The Cabinet Painting Company.