0% Financing For 18 MONTHS

How to Remove Cabinet Doors and Hardware Properly: Step-by-Step Guide for Safe and Effective Removal

This comprehensive guide provides detailed instructions and professional insights, featuring tips from cabinet painting co, into safely removing cabinet doors and hardware. It covers the appropriate tools, methods, troubleshooting tips, and safety precautions backed by expert advice and real-world examples. Whether you are a homeowner or a professional in the home improvement industry, this guide will help you efficiently and safely remove cabinet doors and hardware.
Picture of  Brian Shaffer

Brian Shaffer

Owner

Share This Article On:

What Tools Do You Need to Remove Cabinet Doors and Hardware?

Remove Cabinet Doors and Hardware Properly
When approaching cabinet door removal, the first step is to gather all essential tools and equipment. The required tools include a variety of screwdrivers, drills with appropriate bits, and specialized hand tools designed to disconnect door hardware without causing damage. Having the right tools not only speeds up the removal process but also minimizes the risk of damage to your cabinets. After completing the removal, you might consider consulting with us to ensure that the finishing touches are applied professionally.

Which Screwdrivers and Drills Are Best for Cabinet Door Removal?

For cabinet door removal, use screwdrivers and drills with a firm grip and high torque. A phillips head and flathead screwdriver work for different screw types, while cordless drills with adjustable clutches help prevent stripping screws. an electric screwdriver with multiple bits may also be valuable for precision work, and cabinet painting co suggests these tools are essential for handling various screw sizes encountered in cabinetry.

What Safety Equipment Should You Use When Removing Cabinet Doors?

Safety equipment is essential, as recommended by cabinet painting co, when handling tools and heavy cabinet components. Protective gloves guard against splinters and sharp edges, safety goggles shield your eyes from debris, and a dust mask is advisable in dusty areas. Sturdy work boots and hearing protection for power tools are also recommended to reduce the risk of injury during removal.

Are There Specialized Tools for Removing Cabinet Hardware?

Yes, specialized tools are available like a cabinet door removal kit. These kits often include pry bars, hinge removal tools, and extraction tools for stubborn screws or nails. They are designed specifically for the delicate task of removing cabinet components while preserving the integrity of both the cabinet frame and the door.

How Do You Remove Different Types of Cabinet Doors Safely?

Remove Cabinet Doors and Hardware Properly

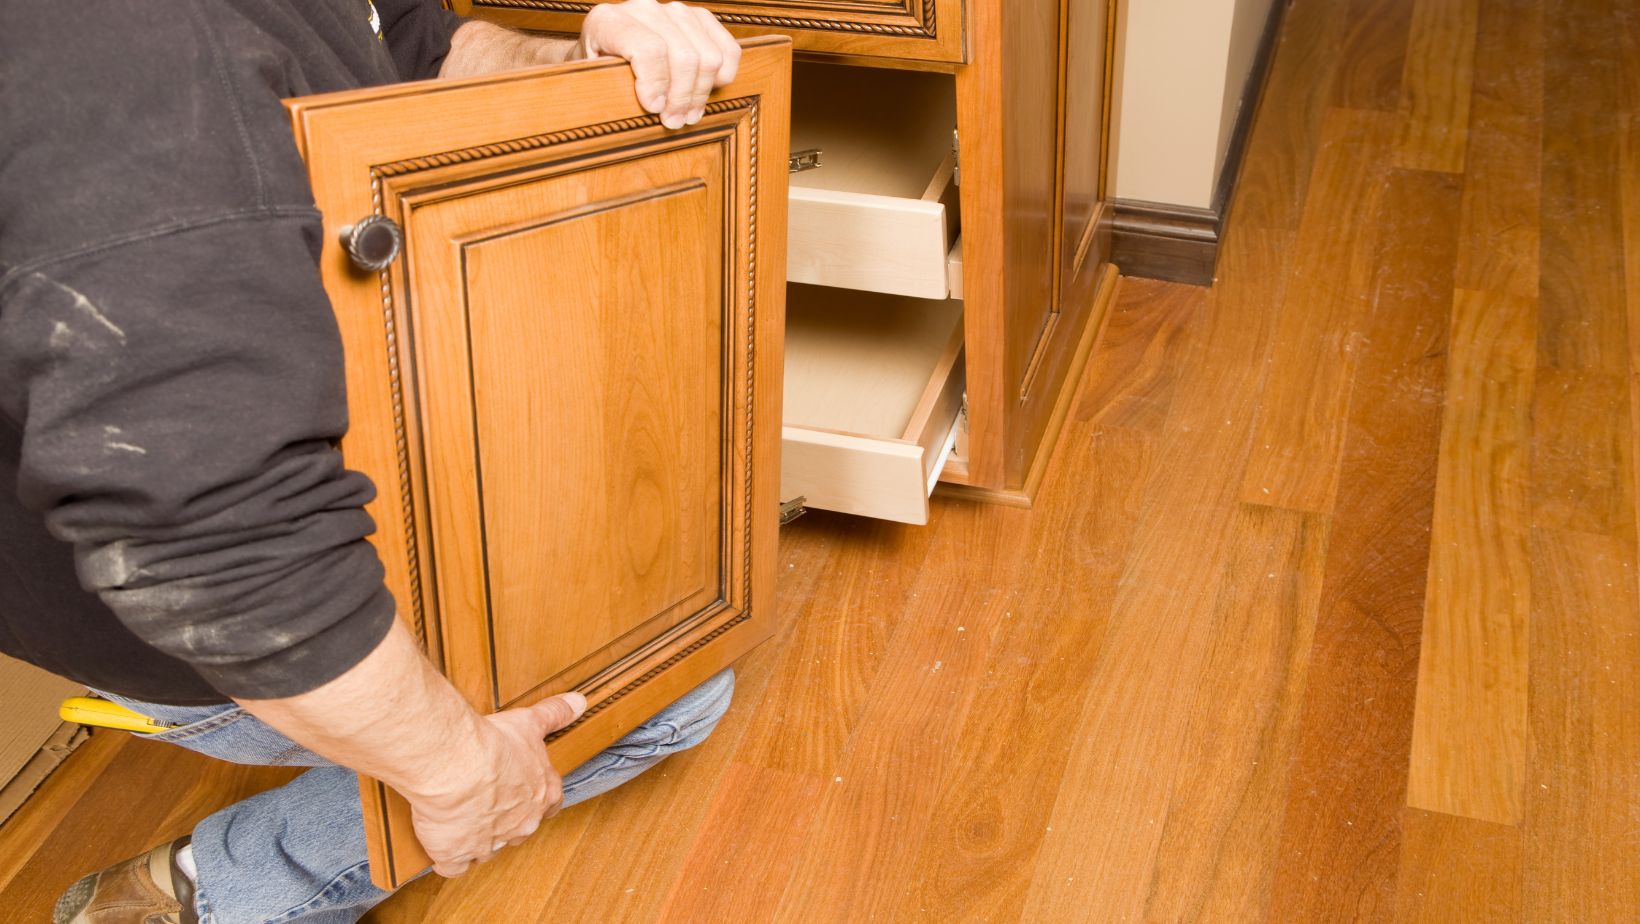
Different cabinet door styles require specific removal techniques. Whether your cabinets are framed, frameless, overlay, or inset, using the correct method minimizes damage to the doors and the surrounding cabinetry.

How to Remove Framed Cabinet Doors Without Damage

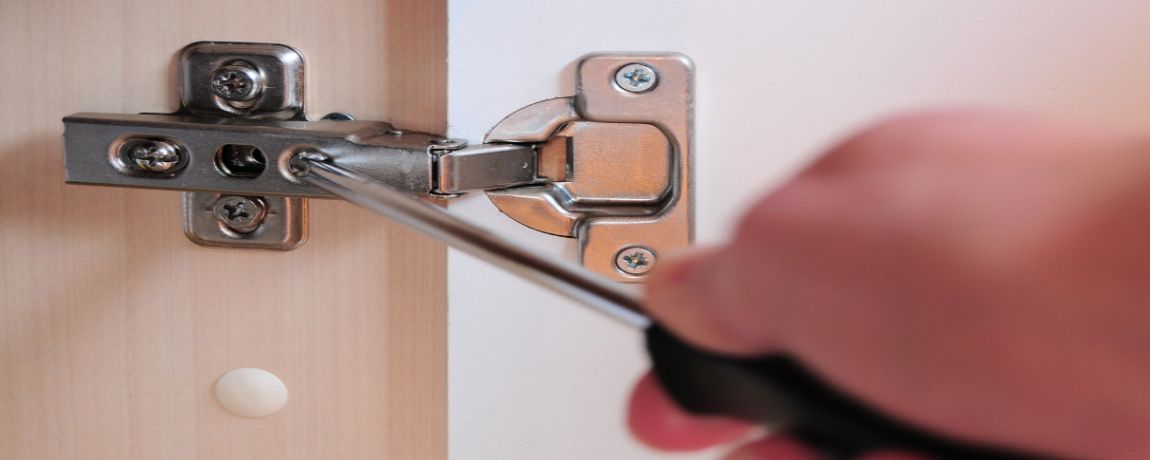
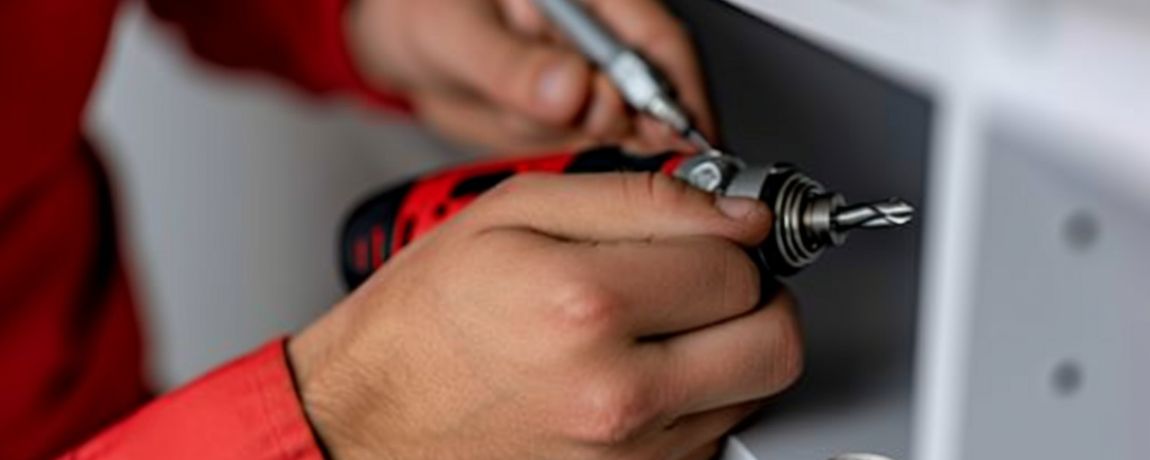
To remove framed cabinet doors, first locate the screws that secure the door frame to the cabinet carcass. Use a screwdriver or drill to carefully extract these screws while supporting the door to prevent sudden drops. Often, additional brackets or clips hold the door in place. Gently pry these away with a flat-head screwdriver or pry tool at a slow, steady pace to avoid structural damage.

What Are the Steps to Remove Frameless Cabinet Doors?

Frameless cabinet doors are typically attached with concealed hinges. Open the door to expose the hinge mechanism, then locate and gradually loosen the adjustment screws while supporting the door. Carefully remove any cover plates or trim using a putty knife and slide the door off the mounting plate. Applying even pressure on both sides helps prevent warping or cracking during removal.
 

How to Take Off Overlay and Inset Cabinet Doors Properly

Overlay doors cover part of the cabinet front, while inset doors fit flush within the frame. For overlay doors, inspect for hidden clips or fasteners along the edges and use a putty knife to separate the door from the frame before removing the screws. Inset doors require similar methods, but extra care is needed to maintain smooth edges. Work slowly around the door and remove any adhesive or sealant binding the door to avoid damage.

What Is the Proper Method to Remove Cabinet Door Hardware?

Removing cabinet door hardware involves a methodical process to handle various fasteners like hinges, knobs, and pulls. This process ensures that each piece is detached without causing unnecessary damage.

How Do You Remove Cabinet Door Hinges Step-by-Step?

Identify the hinge type—full-overlay, half-overlay, or inset. Open the cabinet door and secure it, then locate the screws on either side of the hinge. Remove each screw slowly with a screwdriver or drill while gently pulling the hinge away from the frame. Store screws and hinges in a container for organized future use.

What Are the Best Techniques to Remove Cabinet Door Knobs and Pulls?

For knob or pull removal, first use an appropriate screwdriver or drill bit. Determine if the hardware is attached with screws or slides off a mounting plate. For screw-mounted options, remove the screws carefully. If the hardware is clipped or adhered, use a putty knife or flat pry bar with minimal force. This process helps preserve both the hardware and the cabinet surface for easy reinstallation or replacement.

How to Handle Stripped or Stuck Screws in Cabinet Hardware Removal

When dealing with stripped or stuck screws, apply a small amount of penetrating oil to the screw and let it sit for 10–15 minutes. Then, use a screw extractor tool or a drill set to reverse mode to gradually work the screw free. If these steps fail, carefully drill out the screw while avoiding damage to the underlying cabinet material.

How Can You Troubleshoot Common Problems When Removing Cabinet Doors?

Troubleshooting common removal issues involves a systematic approach. Identify problems such as difficulties in detaching the door, damaged components, or hardware malfunctions by tracing the root cause and then adapting techniques and tools accordingly.

What to Do if the Cabinet Door Won’t Come Off Easily?

If the door is difficult to remove, inspect for hidden fasteners, adhesives, or clips that might be holding it in place. A putty knife can help break the seal around the door edges. Check if corrosion or age has seized the screws, and apply a lubricant if necessary. Use a patient and steady approach to avoid splitting the wood or damaging the frame.

How to Repair or Replace Damaged Cabinet Doors After Removal?

After removal, carefully inspect each door for scratches, cracks, or broken hinges. Minor damage may be repairable with wood filler or sanding. For extensive damage, professional repair or door replacement might be necessary. If the door has been painted or refinished, lightly sand the surface before repainting to ensure a smooth finish. Replacement parts should match the style and finish of the existing cabinetry for consistency.

How to Fix Stripped Screws and Hardware Issues During Removal?

Address stripped screws by using a screw extractor or replacing them with a slightly larger screw or a metal insert to create a new grip. For recurring issues, consider using self-tapping screws during reinstallation. Regular maintenance and timely replacement of worn-out hardware are important for the longevity of your cabinet components.

How Should You Prepare and Clean Cabinet Doors and Cabinets After Removal?

Remove Cabinet Doors and Hardware Properly
Proper preparation and cleaning after removal are essential to maintain the condition of both the doors and the cabinet frames before any repairs, refinishing, or new installations.

What Are the Best Practices for Cleaning Cabinet Doors and Frames?

To clean cabinet components, remove all dust, grease, and old adhesive residues. Start by vacuuming loose debris, then wipe surfaces down with a gentle, diluted cleaning solution (such as water, vinegar, and a small amount of dish soap). A microfiber cloth is useful to avoid scratches. Avoid harsh chemicals that may damage the finish, and always dry the surfaces thoroughly with a clean towel.

How to Inspect Cabinet Doors and Hardware for Damage Post-Removal?

Once removed, closely inspect each door and hardware piece for damage such as cracks, warping, or water damage. Check the condition of hinges, knobs, and pulls for rust, stripped threads, or worn mounts. Document any damage through notes or photographs to plan necessary repairs or replacements, ensuring that the cabinets are ready for reinstallation or a finish update.

What Safety Precautions Are Essential When Removing Cabinet Doors and Hardware?

Following safety precautions is critical to prevent accidents and injuries during cabinet door removal. Consistently following safety guidelines ensures that both your work area and you remain secure throughout the process.

How to Protect Your Work Area and Yourself During Removal?

Prepare a clear, well-lit, and uncluttered workspace where tools and removed components can be organized safely. Use a protective sheet or tarp on the floor to catch debris. Always wear protective gloves, safety goggles, and a dust mask. Keep a first aid kit nearby, and follow manufacturer guidelines when operating power tools. An organized workspace improves both safety and efficiency.

What Are Common Safety Mistakes to Avoid When Removing Cabinet Doors?

Common mistakes include neglecting personal protective equipment, using inappropriate or damaged tools, and applying excessive force when removing screws or doors. Rushing the process can result in missed fasteners or cabinet damage. Also, ensure any adjacent electrical or plumbing connections integrated with the cabinetry are appropriately disconnected. Taking breaks and reassessing your work can significantly reduce the risk of injury.

How Do You Choose Replacement Hardware and Tools After Removing Cabinet Doors?

Choosing the right replacement hardware and reinstallation tools is crucial for achieving a refreshed and improved cabinet finish. Ensure that replacement parts match the design and style of your cabinets while using professional-quality tools for reinstallation.

What Are the Best Replacement Hinges, Knobs, and Pulls for Cabinet Doors?

Select replacement hinges, knobs, and pulls that blend durability with aesthetic appeal. Look for adjustable hinges that ensure proper alignment and smooth operation. For knobs and pulls, popular finishes include brushed nickel, matte black, and antique brass, which add an elegant touch while providing durability. Ergonomic designs that offer a comfortable grip while enhancing visual appeal are ideal. Consultation with a hardware specialist can help determine the best quality and compatibility for your needs.

How to Select Tools for Installing New Cabinet Hardware?

When installing new cabinet hardware, precision and durability in your tools are key. Quality screwdrivers, power drills with adjustable torque, and levelers are essential. Specialized tools like cabinet jig templates or edge guides help ensure proper alignment of hinges, knobs, and pulls. For professionals, a laser level can verify that every component is perfectly aligned. These tools, combined with quality replacement hardware, help achieve a clean, professional installation that enhances both functionality and style.

Table Comparison of Essential Tools and Replacement Hardware

Before diving into application tasks, review the tools and hardware options available. The table below summarizes various products, their key functions, and their advantages.
Remove Cabinet Doors and Hardware Properly
The table above highlights how each component contributes to a safer and more efficient removal and installation process, ensuring higher quality and long-lasting cabinet performance.

Final Thoughts

This guide has provided detailed, step-by-step instructions for safely removing cabinet doors and hardware. Emphasizing proper tool selection, precise techniques for different cabinet types, and essential safety precautions can streamline home improvement projects and enhance the overall aesthetic. By integrating professional methods with specialized tools, you can prevent damage during removal and preserve the cabinet’s integrity for refinishing or replacement.
 
Whether you are a homeowner or a professional, following these steps and troubleshooting common issues will help ensure a smooth, efficient process while maintaining safety and quality. Ultimately, investing in quality tools and a systematic approach makes the transition from old to new cabinetry both successful and rewarding.

Table of Contents

FAQs About How to Remove Cabinet Doors

Basic tools like screwdrivers and a drill can be used for simple removals, but specialized tools such as a cabinet door removal kit and pry bars are recommended to minimize damage to both the cabinet and the door structure.
Framed cabinet doors feature an additional border or frame surrounding the door, whereas frameless doors are integrated directly into the cabinet box. Inspecting the door edges will help you determine the type.
Apply a lubricant such as penetrating oil to loosen the screws, then use a screw extractor or drill with a reverse setting to remove them without causing further damage.
Yes, protective gear like gloves, safety goggles, and a dust mask is essential to help guard against tool-related injuries, debris, and dust inhalation.
Consult with a hardware specialist and compare samples in person to ensure that the selected materials and finishes complement your existing cabinetry design and personal style.
Yes. Avoid using excessive force, neglecting to support the door during removal, and overlooking hidden fasteners or clips. Using the proper tools and a slow, careful approach reduces the risk of damage.
Use a gentle cleaning solution and a microfiber cloth to remove dust, grease, and old adhesive residues. Ensure all surfaces are thoroughly cleaned and dried before any repairs or reinstallation.

Additional Resources

This comprehensive guide provides detailed instructions and professional insights, featuring tips from cabinet painting co, into safely removing cabinet doors and hardware. It covers the appropriate tools, methods, troubleshooting tips, and safety precautions backed by…

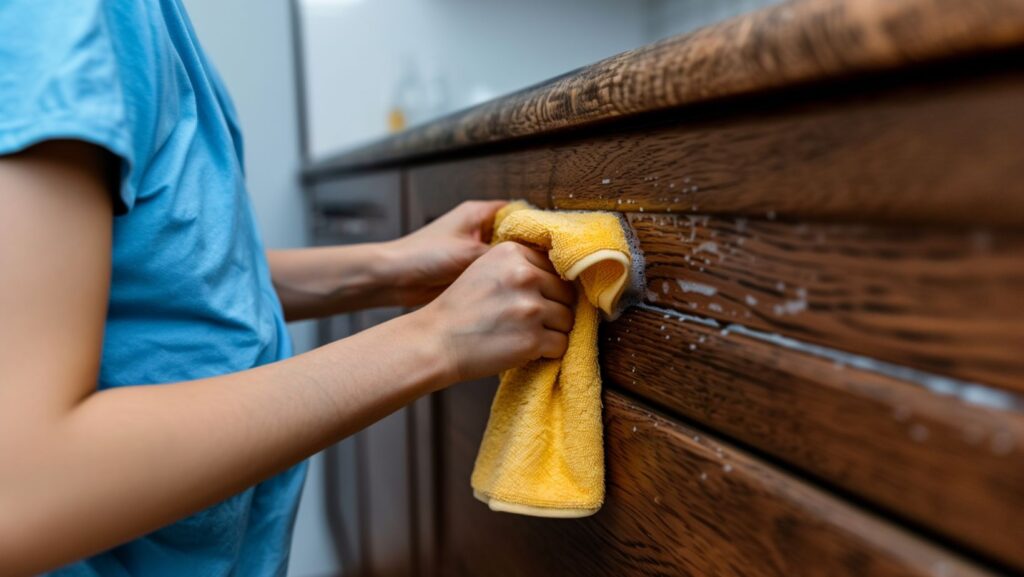
Before starting any cabinet painting project, thorough cleaning of the cabinet surfaces is essential. Proper cleaning ensures that the paint adheres well and the finish remains smooth and durable. In many cases, consulting a cabinet…

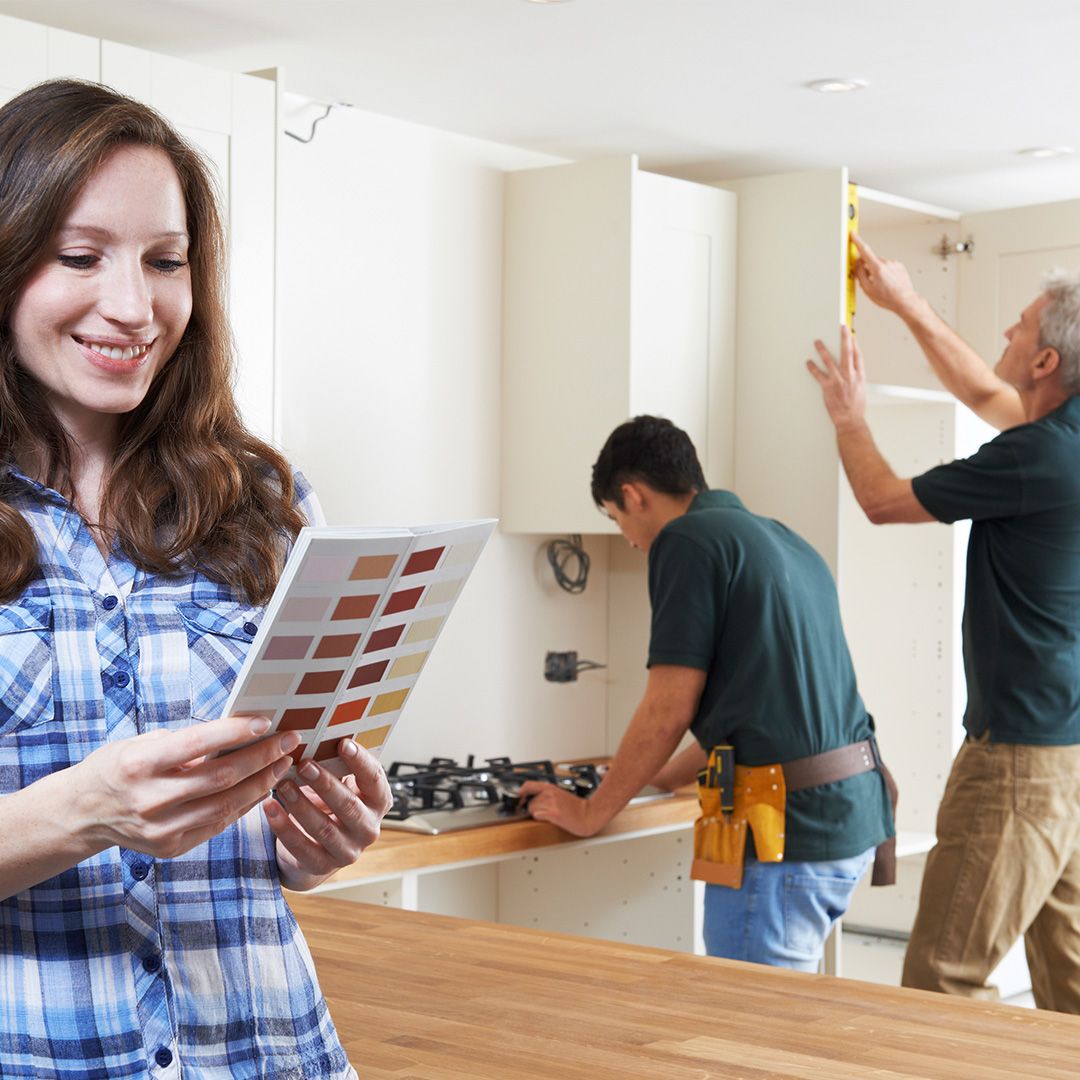
Is your kitchen in need of a fresh look, but a full remodel isn't quite in the cards? Cabinet restoration might be the perfect solution to breathe new life into your space without breaking the…

Ready To Transform Your Cabinets?

Revitalize your kitchen today with our expert cabinet painting services with The Cabinet Painting Company.